skip to main |
skip to sidebar
I made some favor boxes & cupcakes for my friends baby shower that was this past Sunday Here are some pics of them :
These boxes I got at the dollar store for 12 of them they measure 3"x3"x2-14". I trimmed some pattern paper I got from Joann's & cut that down to 2.75" for each box.
Filled each one of them up with some goodies =)....and here are the cupcakes...
My hubby did the food coloring in the icing to try & match the color blue cardstock that I used from Cordenations. I used Plantin Schoolbook, Accent Essentials, New Arrival & Lyrical Letters to do the toppers for the cupcakes. Thanks for stopping by =)
I hope everyone had a wonderful Halloween, I was sick all day & didn't even get to hand out the candies that I got for our little goblins that were in the neighborhood =( not to mention I can't have the goodies b/c I had my wisdom tooth taken out Weds & am having tons of pain so I get to take a trip back to the oral surgeon in the morning so he can look at it =( .....
On a good note I was told that the Gypsy update was already up & running so I am waiting for my update to finish...I can't wait to see what the smiley cart has. I will post more later on once it's done updating & I get a chance to take a look at the new carts I'll have. I had a couple of them but am really excited to get TTB&M, Smiley & Christmas. Anywho talk with you soon. =)
I made these for my hubby's co-workers, he took them to work last night as some people have the weekend off & we wanted to make sure everyone on his team got one.
Materials Used:
4x6 Cello bags from Stampin UP
Colorbox - Black Cardstock
K & Company Patterned Paper
Paper Doll Dress Up for the bats
Glimmer Mist
White gel pen
Sticky Strip & ATG gun for adhesives
I am finally done! I purchased the I-Rock a couple weeks ago & they were out of the clear rhinestones. I looked at Hobby Lobby, Michaels, & Joanns...then as I was walking through one of the isles I saw the iron-on images & thought it's pretty much the same thing....right?!? Well I purchased 2 of these...
I took the rhinestones off the sticky clear plastic sheet & started to seperate them into piles. This is what it looked like after I was done counting out 17 piles & each one included 31 rhinestones. Even after using 527 rhinestones I still have all those that you see on the bottom right corner for other projects. I personally haven't tried the kind that I've seen shown online in projects but I think that this method works great & it's cheaper!
I had 2 little helpers...well they didn't "help" much, they just laid there looking cute & sniffing everything that came within their reach. This lil guy is Romeo, Sadie was being camera shy & jumped down, you can see her lil rear under the table. (sorry for the jammie pic, I do most of my crafting at night)
And now back to the invitations...here is what the front looks like:
This is a view of the inside:
Here is a pic of all but 1 of the invitations done, after I finished the last there was 17 total:
After putting each of them into an envelope here is how I wrapped them to give to the mother-to-be to mail or hand out whichever she prefers:

This blog hop starts now (if your in Central time which I am hehe) & starts at Patty's Crafty Spot. If you are on Facebook & did or didn't get the invite this is what it said : "I am hosting my first blog hop and it's for a good cause, Raising Awareness for Breast Cancer. I have 22 very talented women from all over the world to helping me. Recently we found out another design team member has Breast Cancer and we are helping spread the awarness. Now a lot of you have seen me post my card on facebook but how many of you have visited my blog. This will be a good chance for you to see what myself and many other very talented ladys do. Now there will be lots of blog candy you can win (if you have blog if not they are free to join) thru out all the blogs and I hope on October 26 you can join us." So if your wanting to see some really neat projects, I'm sure these ladies have lots of them to offer.
On another note, I found another really neat blog today! Her name is Saundra & her blog is Luv Scrapping Together. She has some really awesome projects on her blog & some blog candy still going on until Nov 1st.
I am STILL working on those baby shower invitations, I keep adding & adding...I am finally satisfied with what I came up with, with the materials that I had on hand & the short amount of time that I had to work with these. Thankfully majority of the people who are coming live here in town so it will only take 1 day in route to them through mail, if we choose to go that route. Hope you all have a wonderful night/day depending on your sleeping schedule & what part of the world your in!
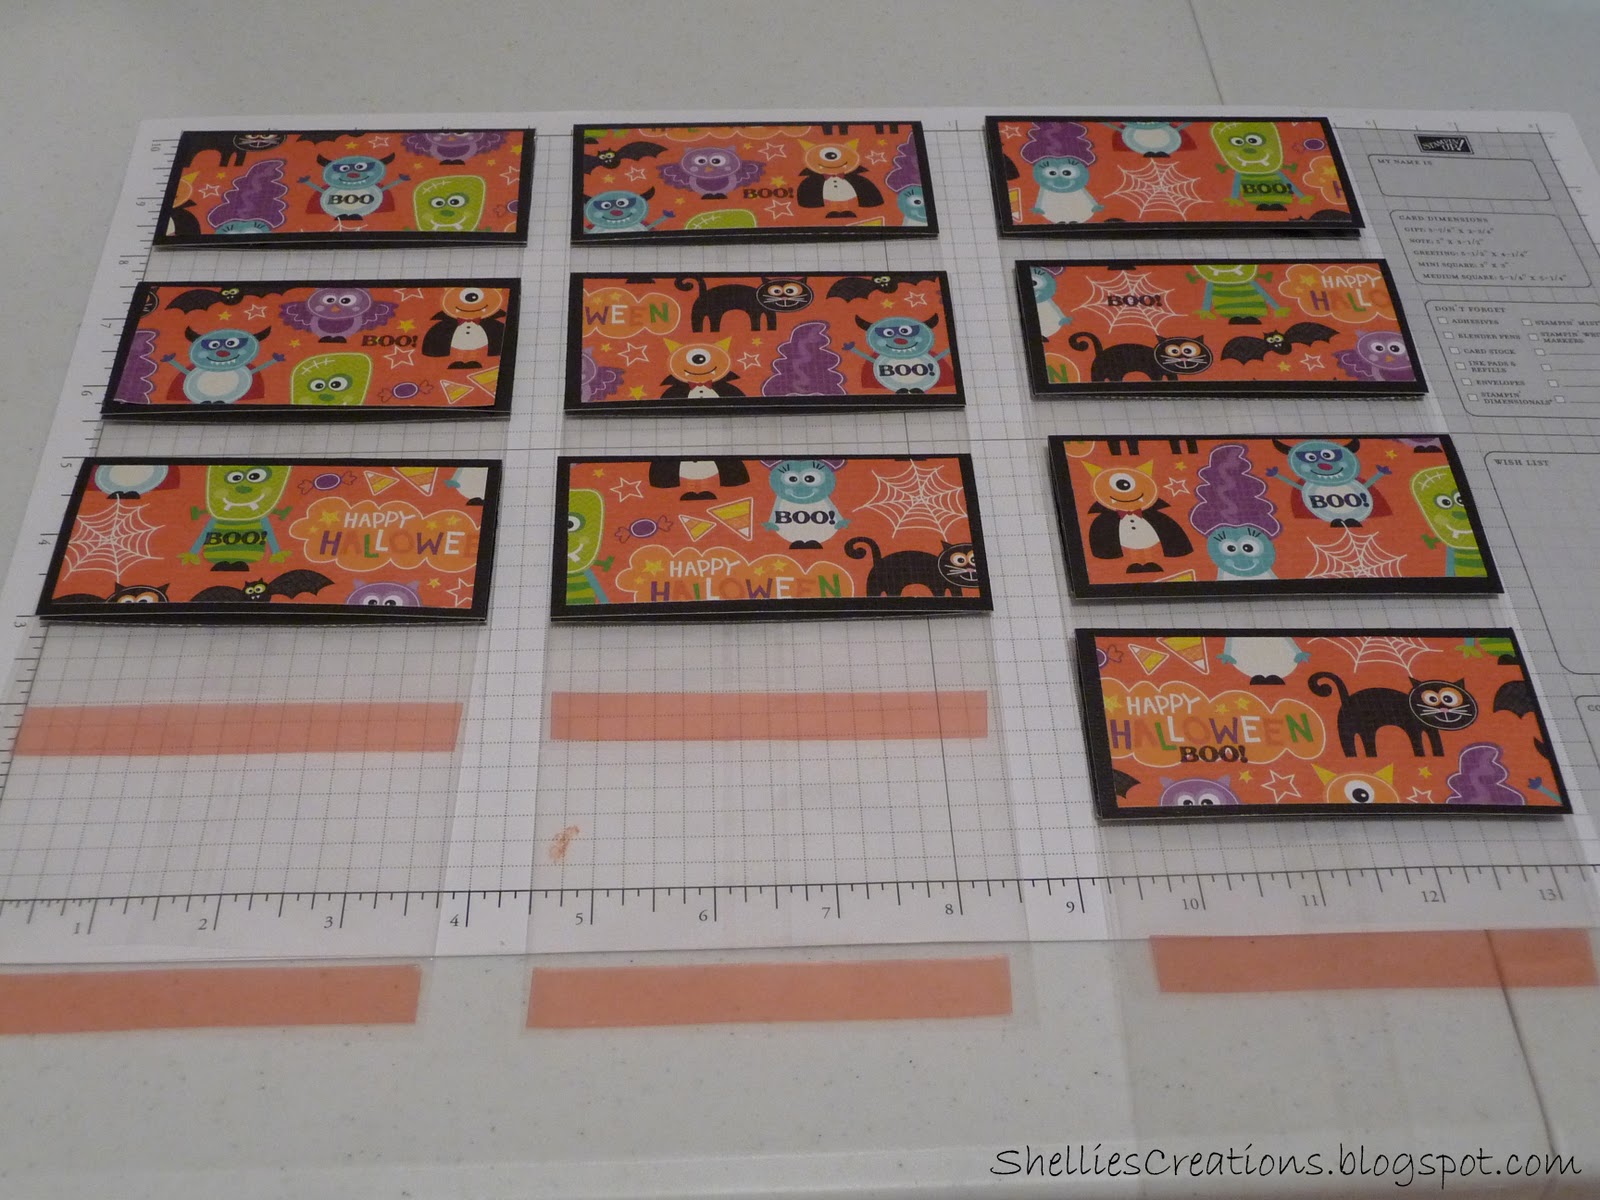
I am currently working on some baby shower invitations for a friend so in the meantime I am going to post the Halloween Goodie Bags that I made for my husband's co-worker for her son.
Materials Used:
Colorbok Black Cardstock
K&Company Spooktacular Patterned Paper
Stamps - PKS Halloween Sweet Folks (BOO!)
Stampin UP 4x6 Cello Bags
ATG 714 & Sticky Strip
I cut the end of the cello bags & added some sticky strip so when she fills her bag all she has to do is remove the sticky strip & seal it. Yes I know it is going to be very hard to get those suckers apart...didn't think of that at the time of making them, but she said that it would be funny watching them try to get them open so it all worked out, lol.
I will be posting the ones that I made for my husband to take to his co-workers once they are full of goodies. Now back to working on these invites that need to get done =) Have a great day!
This past week a friend of mine told me about one of her friends, friend's son who has brain cancer & may be possibly having his last birthday on the 23rd of this month. Hunter will be turning 7 & when asked what he wanted for his birthday he told his dad that he wanted ton's of birthday cards. We had another friend whose birthday was this last Sunday & she asked that for her gift that we all bring a card for Hunter. This past week has been a very crazy hectic week for me so Sunday (the day of the get together) I was finally able to sit down & throw some things together. In total I made 3 cards before having to head out & had 2 birthday cards in my stash so I took her all 5 so she could pass them to others that didn't bring one or to give her daughter to take to class with her & have ppl sign. Here are the pics of the cards that I made. Enjoy!
Materials Used :
Stampin UP Cardstock
Stampin UP Scallop & Circle Punch
Stampin UP Designer Paper
Stamp set - Unsure
***This card was made at my demostrators house during our monthly meeting***
On the inside of this card I used a spring sticker from Imaginisce that had some bling added to it using the I-Rock.
Materials Used :
Stampin UP Cardstock
Stamp sets - Well Scripted & Crazy for Cupcakes
Stampin UP Ribbon
I colored the cupcakes in using Barely Banana, Close to Cocoa, Pixie Pink, Pumpkin Pie & Lavender Lace, after coloring them in I cut them out. I believe the ribbon is also Barely Banana but not sure as it came from my scraps.
Materials Used :
Stampin UP cardstock
Patterned paper was in my stash from Joann's
White Gel Pen
**** If you would like to make Hunter a card for his birthday it would be greatly appriecated. Here is his information & again his birthday is on 10/23 ****
Hunter Scott
C/O Jessica Koehn
PO Box 278
St. Leonard, MD 20685