Monday, April 4, 2011
Stampin Shorty's Birthday Blog Hop =)
Ok guys, just a quick post here. I am in a Blog Hop for a close friend of mine. It is going on this month from the 23rd-30th. I will be posting more info as I get it & if you would like any info about it you can stop by Rosie's blog! I just now have gotten time to get through my pics to get them posted, I've been needing to get this done for so long now but I promise I will have my latest things up in the next day or so =). Keep checking back for more info on the blog hop, I'm definiately looking forward to it =)....oh and there are going to be some blog candy...who doesn't love that?!?! I know I do, talk to you guys soon!!!


Friday, March 11, 2011
small post...
When my husband came home from work this morning he told me of what happened to Japan & the tital wave heading towards Haiwaii & other places. I turned on the tv to see the devistation that happened & is still happening so please pray for everyone who is out there. Regardless of if you know anyone there, they are still human beings, they need all the prayers & help they can get. Off to work I go...rather be at home but gotta do what needs to be done.
Published with Blogger-droid v1.6.7
Saturday, February 26, 2011
Soon to come...
I know I haven't posted much recently. I've been super busy with my new job, house work, having to find a another car since the wreck & lots more. I have done some projects that I plan to post soon. If I get the chance I'll do it tonight, but we'll say tomorrow just to be on the safe side. Hope everyone has been well. Don't forget Stampin Up's Sale-A-Bration ends on 03/31/2011 so make sure you get your orders in. For every $50 spent you get free stamp sets! How cool! Go to my site for more info www.shelliecruz.stampinup.net
Published with Blogger-droid v1.6.7
Saturday, January 22, 2011
Onesie card with Pooh
Now that I've had a minute to sit in my craft room, I'm posting some things that I've made that I haven't had time to post so here goes. The other 2 projects that I made is on my other blog ShelliesStampinSpot.blogspot.com, if you would be so kind as so hop over there and take a peak at my other crafty things. =)
I made this using my Gypsy. I used New Arrivals for the onesie & Pooh & Friends for Pooh. I welded the oneside to create the card.

Materials Used:
Cardstock-
Blushing Bride
(forgot the name of the yellow, it's retired, sorry)
Real Red & Basic Black
Ink-
Blushing Bride
Stamp Set-
Beyond the Basics (retired, sorry)
Hope everyone is having a wonderful weekend, tomorrow is my last day of being a "housewife" I start my new job on Monday, even though I'm nervous I can't wait! Oh & for those who may or may not have a Stampin' Up! Demo or someone you go through our Sale-A-Bration is starting 01/25/11 which means that for every $50 you spend you get a FREE stamp set! If you already have a demo, I'm sure you've been told about this, if you don't have a demo & want more info shoot me an email, I'd be happy to send you any info you want/need. Thanks for looking =)
Cardstock-
Blushing Bride
(forgot the name of the yellow, it's retired, sorry)
Real Red & Basic Black
Ink-
Blushing Bride
Stamp Set-
Beyond the Basics (retired, sorry)
Hope everyone is having a wonderful weekend, tomorrow is my last day of being a "housewife" I start my new job on Monday, even though I'm nervous I can't wait! Oh & for those who may or may not have a Stampin' Up! Demo or someone you go through our Sale-A-Bration is starting 01/25/11 which means that for every $50 you spend you get a FREE stamp set! If you already have a demo, I'm sure you've been told about this, if you don't have a demo & want more info shoot me an email, I'd be happy to send you any info you want/need. Thanks for looking =)
Saturday, January 15, 2011
New Year, 2 blogs
As some of you may have known I signed up to be a Stampin' Up! demo in Nov. I created a blog for my Stampin' Up! stuff only (kinda forgot about only Stampin' Up! stuff on my last post...oops, it's way past my bed time). So for my current followers hop on over to my other blog ShelliesStampinSpot.blogspot.com. I am going to be posting to both of these blogs as I do have other crafty stuff that I do that does contain other material other than Stampin' Up!. I just did my first ever video on how to make a waterfall card, it's uploading now, again it's going to be on the new blog so hop over and take a look and let me know what you think of my first time =).
In other news:
I had my back surgery on 01/07 and am feeling alot better since, I was offered a full time position at a somewhat nearby company and I am going to be starting training on 01/24. This year is going to be a good year! I do have some things that I've made but it's nighty night time for me, I'll post some stuff for you guys tomorrow. Hope everyone has a wonderful weekend =)
In other news:
I had my back surgery on 01/07 and am feeling alot better since, I was offered a full time position at a somewhat nearby company and I am going to be starting training on 01/24. This year is going to be a good year! I do have some things that I've made but it's nighty night time for me, I'll post some stuff for you guys tomorrow. Hope everyone has a wonderful weekend =)
Saturday, January 8, 2011
Waterfall Card
This is the 2nd waterfall card I've made (I'll post pics of the 1st at a later date). I made this for a friend before the Christmas holiday but haven't had time to post it.
 I hope you enjoy this card, I have fallen in love with making these there are so fun to make!
Materials Used:
Old Olive Cardstock
Pear Pizzazz Cardstock
Very Vanilla Cardstock
Fast & Fun Note Stamp Set
Fast Flowers Stampin Wheel
Old Olive & Pear Pizzazz Stampin Write Markers
Old Olive Ribbon
Silver Brads
If you would like any of these items you can send me an email or go to my online shop at http://www.shelliecruz.stampinup.net/

Materials Used:
Old Olive Cardstock
Pear Pizzazz Cardstock
Very Vanilla Cardstock
Fast & Fun Note Stamp Set
Fast Flowers Stampin Wheel
Old Olive & Pear Pizzazz Stampin Write Markers
Old Olive Ribbon
Silver Brads
If you would like any of these items you can send me an email or go to my online shop at http://www.shelliecruz.stampinup.net/
Thursday, December 16, 2010
Long time, no post...
It's been a while since I've posted anything. I signed up to be a Stampin' Up! demo the middle of last month & today I should be getting my 1st order since getting my starter kit. I've been working on a bunch of different things at once. I really could use a clone, LOL!!! We finally got the tree up, now to keep the cats from attacking it...we thought we'd have a problems with the pups getting it...nope its the cats, lol. I have all but 2 presents wrapped (1 is going to be done after this post & the other present arrives tomorrow then I'm done woo hoo!!!) I posted some cards that I made before I was a demo at my other blog, you can see them at shelliesstampinspot.blogspot.com. I haven't had time to make a fb page for my other blog yet so I'm going to upload those pics to this blogs fb page. Hope you enjoy & have a great day =)
Sunday, December 5, 2010
Mommy To Be Card
I made this for an old co-worker of mine who is expecting her first child. They just found out Friday that they were having a girl & the baby's room has green in it so I thought these colors mixed well with each other. I cut the Mommy-to-be from New Arrivals cart at 4.5" & ran the shirt through my Cuttlebug using the Swiss Dots folder. I used some Diamond Stickles where the bow would be on the shirt, then I added a layer of Glossy Accents on it after the stickles dried to give it more dimension. Enjoy & have a great day =)
 Materials Used:
Cardstock:
Green Galore (Retired) - Stampin' Up!
Chocolate Chip - Stampin' Up!
Very Vanilla - Stampin' Up!
Basic Black - Stampin' Up!
(Shirt & Pants unsure of they were from my scraps but they are from Stampin' Up!)
Patterned Paper is out of the Nana's Kids pack from DCWV
Ribbon:
Both purchased at Walmart
Other:
Cuttlebug & Swiss Dots folder
Glue dots to keep bows in place
Micron .005 & .05 pens
Stampin Pastels from Stampin' Up!

Cardstock:
Green Galore (Retired) - Stampin' Up!
Chocolate Chip - Stampin' Up!
Very Vanilla - Stampin' Up!
Basic Black - Stampin' Up!
(Shirt & Pants unsure of they were from my scraps but they are from Stampin' Up!)
Patterned Paper is out of the Nana's Kids pack from DCWV
Ribbon:
Both purchased at Walmart
Other:
Cuttlebug & Swiss Dots folder
Glue dots to keep bows in place
Micron .005 & .05 pens
Stampin Pastels from Stampin' Up!
Saturday, December 4, 2010
Birthday Card
I made this for my niece's 18th birthday (I can't believe she's already 18, they grow up so quickly!!!). It's a sidestair card, I tried one of these about a yr ago & didn't like the outcome of it but I found a good template at http://www.mariestamps.com/ & like how this one turned out. Hope you like it, I enjoyed making it =)
 Materials Used:
Cardstock:
Pink Passion (Retired) - Stampin' Up!
Green Galore (Retired) - Stampin' Up!
Very Vanilla - Stampin' Up!
Ink:
Pink Passion (Retired) - Stampin' Up!
Green Galore (Retired) - Stampin' Up!
YoYo Yellow (Retired) - Stampin' Up!
Pixie Pink (Retired) - Stampin' Up!
Real Red - Stampin' Up!
Staz-On Jet Black
Stamp Sets:
Fun & Fast Notes - Stampin' Up!
Fabulous Phrases - Stampin' Up!
Ribbon:
Pretty In Pink - Stampin' Up!

Cardstock:
Pink Passion (Retired) - Stampin' Up!
Green Galore (Retired) - Stampin' Up!
Very Vanilla - Stampin' Up!
Ink:
Pink Passion (Retired) - Stampin' Up!
Green Galore (Retired) - Stampin' Up!
YoYo Yellow (Retired) - Stampin' Up!
Pixie Pink (Retired) - Stampin' Up!
Real Red - Stampin' Up!
Staz-On Jet Black
Stamp Sets:
Fun & Fast Notes - Stampin' Up!
Fabulous Phrases - Stampin' Up!
Ribbon:
Pretty In Pink - Stampin' Up!
Monday, November 22, 2010
Blog Hop Winner Announced!
We have a winner!!! I went through Random.org & this is the result....
So our lucky winner is :
Crystal aka Caitlynsmommy said...
Oh I love all your projects! I love fall and CAC so these are awesome! Great job hon! WOOHOOOOO! Thank you for being a fairy too!
CONGRATS Crystal, please send me your info to I can get your goodies out to you.
I would like to thank everyone who made this blog hop possible & for all the people who stopped by, left comments & some became new followers. I truly loved every comment left on my blog, I read them all! To all my new followers welcome, I hope to bring more projects soon. I can't believe that it's almost Christmas...where did the time go?!?! I have some projects that I've done for Christmas time so I will be taking pics & posting those later today or tomorrow! Hope you all have a wonderful day & thanks for stopping by!
Saturday, November 20, 2010
Cricut Card Fairy Blog Hop
Welcome to the Cricut Card Fairy Blog Hop. This month we are practicing being thankful for all the blessings in our lives. What are you thankful for? I personally am thankful for A LOT. First would have to be God, he gives me the strength to make it through some of the most difficult things in life! I am also very thankful for my wonderful husband & parents. My husband means the world to me, he is extremely supportive of anything I do. My parents (and husband) are my best friends, I can talk to them about anything & I am very thankful to have that kind of relationship with them. Of course I can't forget my friends. My friends have helped me through some tough times in life & it really does prove no matter how long you go without speaking with an old friend, you pick up right where you left off & I am thankful to still have some of my childhood friends in my life! Do you appreciate the small things in life? I surely do, it's the small things that make things what they are! With that in mind us wonderful fairies have put together some awesome THANKSGIVING/THANKFUL themed crafty items. Along the way there will be opportunities for inspiration and blog candy. So make sure you hop all the way through, leave comments on every blog as we all love reading your comments. Crystal will be giving away a BNIP Hello Kitty Greetings cart to a person that leaves a comment on all blogs during the hop. If you have just come from KarelJ's then you are in the right spot. If you just happened upon my blog & want to start at the beginning of the hop click HERE. I will have a list of all the blog's posted after my projects & blog candy in case you get lost along the way. Hope you enjoy my projects & Happy Hoppin'!!!
 I used my new Create-A-Critter cart for all my projects today (I fell in love with that cart when I got it). I used my Gypsy to weld the shadow feature together to make this cute turkey card. I cut the card & all layers at 4". I used my I-Rock & Stickles to add some bling to him. Next is this cute card...
 I wanted something simple but cute. I used PKS Everyday Face Assortment on the leaves, white gel pen for the eyes, adhered the bow using some Zip Dry glue & added some faux stitching. Next up are these cute wooden tags...
 I got the wooden tags at Joanns (they came in a pack of about 8 for 1.00). I covered them in cardstock & patterned paper then sponged some ink around the edges & added ribbon. I added more of the cute leaves I had cut out & outlined them with faux stitching. Then used my I-Rock to add some bling to them. Here are all the projects together...
 And last but not least here is some blog candy that I'm giving away. It includes The Paper Company Studio Snowflake Clear Stamps, Cuttlebug Spots & Dots Folder & some dimensionals from Stampin' Up! (We can never have to many dimensionals can we?!?!) All you have to do is leave a comment on this post & I will choose a winner on Monday using Random.org. Make sure you leave a way for me to get in contact with you. I don't require that you become a follower or anything, however if you like my work I would love to have you follow my blog =)
 Now hop on over to Gina's blog as she is next up & I'm sure she has something wonderful in store for you as well.
Here is a complete list of all the blogs in case you get lost:
Crystal - http://crystalscraftycreations.blogspot.com/
Deb - http://tidbitsplace.blogspot.com/
Adrea - http://adreatravis2008.blogspot.com/
Rachel - http://trickut-rachelscrafts.blogspot.com/
Kisa - http://www.kisatrtleskreativekorner.blogspot.com/
Jessie - http://scrappyjess.blogspot.com/
Penny - http://lightwhimsy.blogspot.com/
KarelJ - http://karelj.blogspot.com/
Shellie - http://shelliescreations.blogspot.com/ <- You Are Here
Gina - http://ginathorntonstamping.blogspot.com/
Jamie - http://www.jamieisacraftymomma.blogspot.com/
Wanda - http://wandaswhimsicalwonders.blogspot.com/
Joy - http://blondemommy26.blogspot.com/
Sheryl - http://sherylscraftingcorner.blogspot.com/
If your wondering what Cricut Card Fairies are, well we are a group of people from the cricut messageboard that gets emails sent to us by our "Fairy Commander" & if we can, we make cards for almost any request you can think possible! This is something that we aren't paid to do (I've been asked that before). We do this out of the kindness of our hearts because we know that whoever is on the receiving end of our cards will have a smile on their face when they get homemade cards from people that they don't even know! It has brought me joy to know that I have been able to put smiles on others faces. If you would like more info about this click here or you could send an email to cricutcardfairyarmy@gmail.com. Thank you for stopping by & again Happy Hoppin'!!!


Here is a complete list of all the blogs in case you get lost:
Crystal - http://crystalscraftycreations.blogspot.com/
Deb - http://tidbitsplace.blogspot.com/
Adrea - http://adreatravis2008.blogspot.com/
Rachel - http://trickut-rachelscrafts.blogspot.com/
Kisa - http://www.kisatrtleskreativekorner.blogspot.com/
Jessie - http://scrappyjess.blogspot.com/
Penny - http://lightwhimsy.blogspot.com/
KarelJ - http://karelj.blogspot.com/
Shellie - http://shelliescreations.blogspot.com/ <- You Are Here
Gina - http://ginathorntonstamping.blogspot.com/
Jamie - http://www.jamieisacraftymomma.blogspot.com/
Wanda - http://wandaswhimsicalwonders.blogspot.com/
Joy - http://blondemommy26.blogspot.com/
Sheryl - http://sherylscraftingcorner.blogspot.com/
If your wondering what Cricut Card Fairies are, well we are a group of people from the cricut messageboard that gets emails sent to us by our "Fairy Commander" & if we can, we make cards for almost any request you can think possible! This is something that we aren't paid to do (I've been asked that before). We do this out of the kindness of our hearts because we know that whoever is on the receiving end of our cards will have a smile on their face when they get homemade cards from people that they don't even know! It has brought me joy to know that I have been able to put smiles on others faces. If you would like more info about this click here or you could send an email to cricutcardfairyarmy@gmail.com. Thank you for stopping by & again Happy Hoppin'!!!
Thursday, November 18, 2010
Blog Hop Update
Just wanted to let you know that the dates have changed just a bit for the hop. It will now be on Nov 20th & 21st. I am working on my post, I have all the projects done & can't wait for you to see them. I have heard through the grapevine that there will be some blog candy along the way so you won't want to miss it. We would love it if you have the time to make a stop by each blog & leave some love (comments) as we all like to read them. I am finishing this small post with one of my 1st cricut projects. Last year my husband wanted me to make him something "goofy" to keep at his desk & wanted it to be kinda a Thanksgiving themed thing so I made him this....

He named him "Gobbles" & he was cut from Stretch your Imagination at I believe just a little under 12". "Gobbles" stayed put on the fridge until a couple days ago when Anthony (hubby) took him back to work..we still laugh at "gobbles" every time we see it..so goofy lol. Hope you have a good night & hope you stop back by for the blog hop!

He named him "Gobbles" & he was cut from Stretch your Imagination at I believe just a little under 12". "Gobbles" stayed put on the fridge until a couple days ago when Anthony (hubby) took him back to work..we still laugh at "gobbles" every time we see it..so goofy lol. Hope you have a good night & hope you stop back by for the blog hop!
Tuesday, November 16, 2010
My 1st Blog Hop =)
I am going to be in the Cricut Card Fairy Blog Hop that is a Thanksgiving/Thankful themed blog hop with 14 people (including myself as of the last email) taking place Nov 19th-21st. This is the 1st Blog Hop that I've ever been in & am excited about it! There was a sale on cricut carts & my hubby told me to go ahead & get the 2 that I've been dying to get...so I now own Simply Charmed & Create-A-Critter. I've been wanting Create-A-Critter since it came out & how do I love it. I've already made a couple of projects using that cart. I also got my PKS in the mail, I purchased Everyday Face Assortment & Everyday Character Face Parts & have been using those on some of the things that I've made. I also got my Don Juan cart that I used my cricut rewards points on, I love that font. Today started off wonderful, I woke up to an email that I was the lucky winner of PKS Our 2 Angels In Heaven stampset from Vivienne @ Crafting Haven. She is one of the DT members for PKS. Just wanted to do a small update before the hop, now back to my crafting I go..lol. Hope you all have a great night & hope you stop by during the hop!!!
Friday, November 12, 2010
Birthday Card
My friend's birthday is next week...eeek!!! I had out-patient surgery on my back yesterday & am just now able to get back into my craft room. Here is the very simple card I made for her using her 2 favorite colors...blue & silver.

I used Smiley Carts for this present & ran it through my Cuttlebug using Spots & Dots for the main portion of it & then used Swiss Dots & colored over the dots using my Stampin Write Marker (I popped up the "ribbon" on the present using some dimensionals & adhered it to the front base using my ATG714). I used some frost Smooch Spritz spray & then I added this cute litte face from PK-490 Everyday Character Face Assortment & used my white gel pen to add some faux stitching. Here is the inside of the card :
 I used Don Juan for the font (I just love this font), of course I used my lovely gyspy & welded everything together. After cutting & using some frost Smooth Spritz spray I used my Zig 2 Way to adhere it & then added some faux stitching with my while gel pen. Hope you enjoy =)
**I am going to be in a blog hop (my first ever, I'm so excited) on Nov 19th-21st. As soon as I have the line up of the others that are going to be involved I will make a post with that info, hope you will be able to hop along with me =)**
Have a wonderful weekend!!! If you haven't already check out the blog hop that is going on for PKS, 1st stop will be Peachy Keen Stamps Blog, there are some WONDERFUL projects from very talented ppl!!!

I used Smiley Carts for this present & ran it through my Cuttlebug using Spots & Dots for the main portion of it & then used Swiss Dots & colored over the dots using my Stampin Write Marker (I popped up the "ribbon" on the present using some dimensionals & adhered it to the front base using my ATG714). I used some frost Smooch Spritz spray & then I added this cute litte face from PK-490 Everyday Character Face Assortment & used my white gel pen to add some faux stitching. Here is the inside of the card :

**I am going to be in a blog hop (my first ever, I'm so excited) on Nov 19th-21st. As soon as I have the line up of the others that are going to be involved I will make a post with that info, hope you will be able to hop along with me =)**
Have a wonderful weekend!!! If you haven't already check out the blog hop that is going on for PKS, 1st stop will be Peachy Keen Stamps Blog, there are some WONDERFUL projects from very talented ppl!!!
Tuesday, November 9, 2010
Baby Shower Stuff
I made some favor boxes & cupcakes for my friends baby shower that was this past Sunday Here are some pics of them :

These boxes I got at the dollar store for 12 of them they measure 3"x3"x2-14". I trimmed some pattern paper I got from Joann's & cut that down to 2.75" for each box.

Filled each one of them up with some goodies =)....and here are the cupcakes...

My hubby did the food coloring in the icing to try & match the color blue cardstock that I used from Cordenations. I used Plantin Schoolbook, Accent Essentials, New Arrival & Lyrical Letters to do the toppers for the cupcakes. Thanks for stopping by =)

These boxes I got at the dollar store for 12 of them they measure 3"x3"x2-14". I trimmed some pattern paper I got from Joann's & cut that down to 2.75" for each box.

Filled each one of them up with some goodies =)....and here are the cupcakes...

My hubby did the food coloring in the icing to try & match the color blue cardstock that I used from Cordenations. I used Plantin Schoolbook, Accent Essentials, New Arrival & Lyrical Letters to do the toppers for the cupcakes. Thanks for stopping by =)
Sunday, October 31, 2010
Happy Halloween!!!
I hope everyone had a wonderful Halloween, I was sick all day & didn't even get to hand out the candies that I got for our little goblins that were in the neighborhood =( not to mention I can't have the goodies b/c I had my wisdom tooth taken out Weds & am having tons of pain so I get to take a trip back to the oral surgeon in the morning so he can look at it =( .....
On a good note I was told that the Gypsy update was already up & running so I am waiting for my update to finish...I can't wait to see what the smiley cart has. I will post more later on once it's done updating & I get a chance to take a look at the new carts I'll have. I had a couple of them but am really excited to get TTB&M, Smiley & Christmas. Anywho talk with you soon. =)
On a good note I was told that the Gypsy update was already up & running so I am waiting for my update to finish...I can't wait to see what the smiley cart has. I will post more later on once it's done updating & I get a chance to take a look at the new carts I'll have. I had a couple of them but am really excited to get TTB&M, Smiley & Christmas. Anywho talk with you soon. =)
Friday, October 29, 2010
More Halloween Goodie Bags
I made these for my hubby's co-workers, he took them to work last night as some people have the weekend off & we wanted to make sure everyone on his team got one.

Materials Used:
4x6 Cello bags from Stampin UP
Colorbox - Black Cardstock
K & Company Patterned Paper
Paper Doll Dress Up for the bats
Glimmer Mist
White gel pen
Sticky Strip & ATG gun for adhesives

Materials Used:
4x6 Cello bags from Stampin UP
Colorbox - Black Cardstock
K & Company Patterned Paper
Paper Doll Dress Up for the bats
Glimmer Mist
White gel pen
Sticky Strip & ATG gun for adhesives
Tuesday, October 26, 2010
Baby Shower Invitations
I am finally done! I purchased the I-Rock a couple weeks ago & they were out of the clear rhinestones. I looked at Hobby Lobby, Michaels, & Joanns...then as I was walking through one of the isles I saw the iron-on images & thought it's pretty much the same thing....right?!? Well I purchased 2 of these...
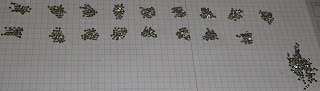
 I took the rhinestones off the sticky clear plastic sheet & started to seperate them into piles. This is what it looked like after I was done counting out 17 piles & each one included 31 rhinestones. Even after using 527 rhinestones I still have all those that you see on the bottom right corner for other projects. I personally haven't tried the kind that I've seen shown online in projects but I think that this method works great & it's cheaper!
I had 2 little helpers...well they didn't "help" much, they just laid there looking cute & sniffing everything that came within their reach. This lil guy is Romeo, Sadie was being camera shy & jumped down, you can see her lil rear under the table. (sorry for the jammie pic, I do most of my crafting at night)

And now back to the invitations...here is what the front looks like:

This is a view of the inside:

Here is a pic of all but 1 of the invitations done, after I finished the last there was 17 total:

After putting each of them into an envelope here is how I wrapped them to give to the mother-to-be to mail or hand out whichever she prefers:

For the making of these I used Paper Doll Dress Up (frog) & Lyrical Letters (font). I used my gypsy to weld all the letters together & throw everything together that needed to be cut. I used Old Olive & Very Vanilla from Stampin Up! for the colors. I ran the Very Vanilla through my cuttlebug using the Spots & Dots folder. The ribbon I picked up from Walmart, it goes well with the Old Olive. I used my snail adhesive to adhere the ribbon to the embossed cardstock & then used the I-Rock & set 3 rhinestones (not counted in the piles above, lol) to the right of where my little frog is. I used some dimensionals to pop the frog up & did some faux stitching on them to give them a little more something. The front still looked a little to plain so I grabbed my Zig 2 Way glue pen & used that on the "your invited" & put some fine glitter I had in my craft room on it. After it dried I ran them through my Xyron & adhered them to the front of the invitation. On the inside is where the 17 piles of 31 rhinestones come into play...it just looked to plain so I had to bling it up. I ran all the words through my Xyron & after doing that is when I used the I-Rock to adhere the gems. I took a pencil & drew very faint lines to give me a straight line to write on when I put the info down (almost forgot to take pics before I had written down all the info..eek!). After getting all the info written down using my Old Olive Stampin Write Marker I just erased the lines & you'd never know that they were there...unless of course your reading this, then yes you now know, lol. Here is a list of everything used (although I think I pretty much covered already but just in case):
Cricut Expression
Gypsy
Paper Doll Dress Up for the frog & it was cut @ 3.05" x 8.00"
Lyrical Letters for the font, I used the Jumbo & used all caps. Cut @ 1" for Baby Shower & all other words were cut @ .55"
ATG gun
Snail Adhesive
Old Olive Cardstock & Stampin Write Marker - Stampin Up!
Very Vanilla Cartstock - Stampin Up!
Ribbon - Walmart
I-Rock & rhinestones
Zig 2 Way glue pen
I really hope you enjoyed today's post, I think they turned out quite cute if I don't say so myself =) Thanks for stopping by & have a wonderful day =)


I had 2 little helpers...well they didn't "help" much, they just laid there looking cute & sniffing everything that came within their reach. This lil guy is Romeo, Sadie was being camera shy & jumped down, you can see her lil rear under the table. (sorry for the jammie pic, I do most of my crafting at night)

And now back to the invitations...here is what the front looks like:

This is a view of the inside:

Here is a pic of all but 1 of the invitations done, after I finished the last there was 17 total:

After putting each of them into an envelope here is how I wrapped them to give to the mother-to-be to mail or hand out whichever she prefers:

For the making of these I used Paper Doll Dress Up (frog) & Lyrical Letters (font). I used my gypsy to weld all the letters together & throw everything together that needed to be cut. I used Old Olive & Very Vanilla from Stampin Up! for the colors. I ran the Very Vanilla through my cuttlebug using the Spots & Dots folder. The ribbon I picked up from Walmart, it goes well with the Old Olive. I used my snail adhesive to adhere the ribbon to the embossed cardstock & then used the I-Rock & set 3 rhinestones (not counted in the piles above, lol) to the right of where my little frog is. I used some dimensionals to pop the frog up & did some faux stitching on them to give them a little more something. The front still looked a little to plain so I grabbed my Zig 2 Way glue pen & used that on the "your invited" & put some fine glitter I had in my craft room on it. After it dried I ran them through my Xyron & adhered them to the front of the invitation. On the inside is where the 17 piles of 31 rhinestones come into play...it just looked to plain so I had to bling it up. I ran all the words through my Xyron & after doing that is when I used the I-Rock to adhere the gems. I took a pencil & drew very faint lines to give me a straight line to write on when I put the info down (almost forgot to take pics before I had written down all the info..eek!). After getting all the info written down using my Old Olive Stampin Write Marker I just erased the lines & you'd never know that they were there...unless of course your reading this, then yes you now know, lol. Here is a list of everything used (although I think I pretty much covered already but just in case):
Cricut Expression
Gypsy
Paper Doll Dress Up for the frog & it was cut @ 3.05" x 8.00"
Lyrical Letters for the font, I used the Jumbo & used all caps. Cut @ 1" for Baby Shower & all other words were cut @ .55"
ATG gun
Snail Adhesive
Old Olive Cardstock & Stampin Write Marker - Stampin Up!
Very Vanilla Cartstock - Stampin Up!
Ribbon - Walmart
I-Rock & rhinestones
Zig 2 Way glue pen
I really hope you enjoyed today's post, I think they turned out quite cute if I don't say so myself =) Thanks for stopping by & have a wonderful day =)
Monday, October 25, 2010
Inking Pink Blog Hop!
This blog hop starts now (if your in Central time which I am hehe) & starts at Patty's Crafty Spot. If you are on Facebook & did or didn't get the invite this is what it said : "I am hosting my first blog hop and it's for a good cause, Raising Awareness for Breast Cancer. I have 22 very talented women from all over the world to helping me. Recently we found out another design team member has Breast Cancer and we are helping spread the awarness. Now a lot of you have seen me post my card on facebook but how many of you have visited my blog. This will be a good chance for you to see what myself and many other very talented ladys do. Now there will be lots of blog candy you can win (if you have blog if not they are free to join) thru out all the blogs and I hope on October 26 you can join us." So if your wanting to see some really neat projects, I'm sure these ladies have lots of them to offer.
On another note, I found another really neat blog today! Her name is Saundra & her blog is Luv Scrapping Together. She has some really awesome projects on her blog & some blog candy still going on until Nov 1st.
I am STILL working on those baby shower invitations, I keep adding & adding...I am finally satisfied with what I came up with, with the materials that I had on hand & the short amount of time that I had to work with these. Thankfully majority of the people who are coming live here in town so it will only take 1 day in route to them through mail, if we choose to go that route. Hope you all have a wonderful night/day depending on your sleeping schedule & what part of the world your in!
On another note, I found another really neat blog today! Her name is Saundra & her blog is Luv Scrapping Together. She has some really awesome projects on her blog & some blog candy still going on until Nov 1st.
I am STILL working on those baby shower invitations, I keep adding & adding...I am finally satisfied with what I came up with, with the materials that I had on hand & the short amount of time that I had to work with these. Thankfully majority of the people who are coming live here in town so it will only take 1 day in route to them through mail, if we choose to go that route. Hope you all have a wonderful night/day depending on your sleeping schedule & what part of the world your in!
Tuesday, October 19, 2010
Halloween Goodie Bags
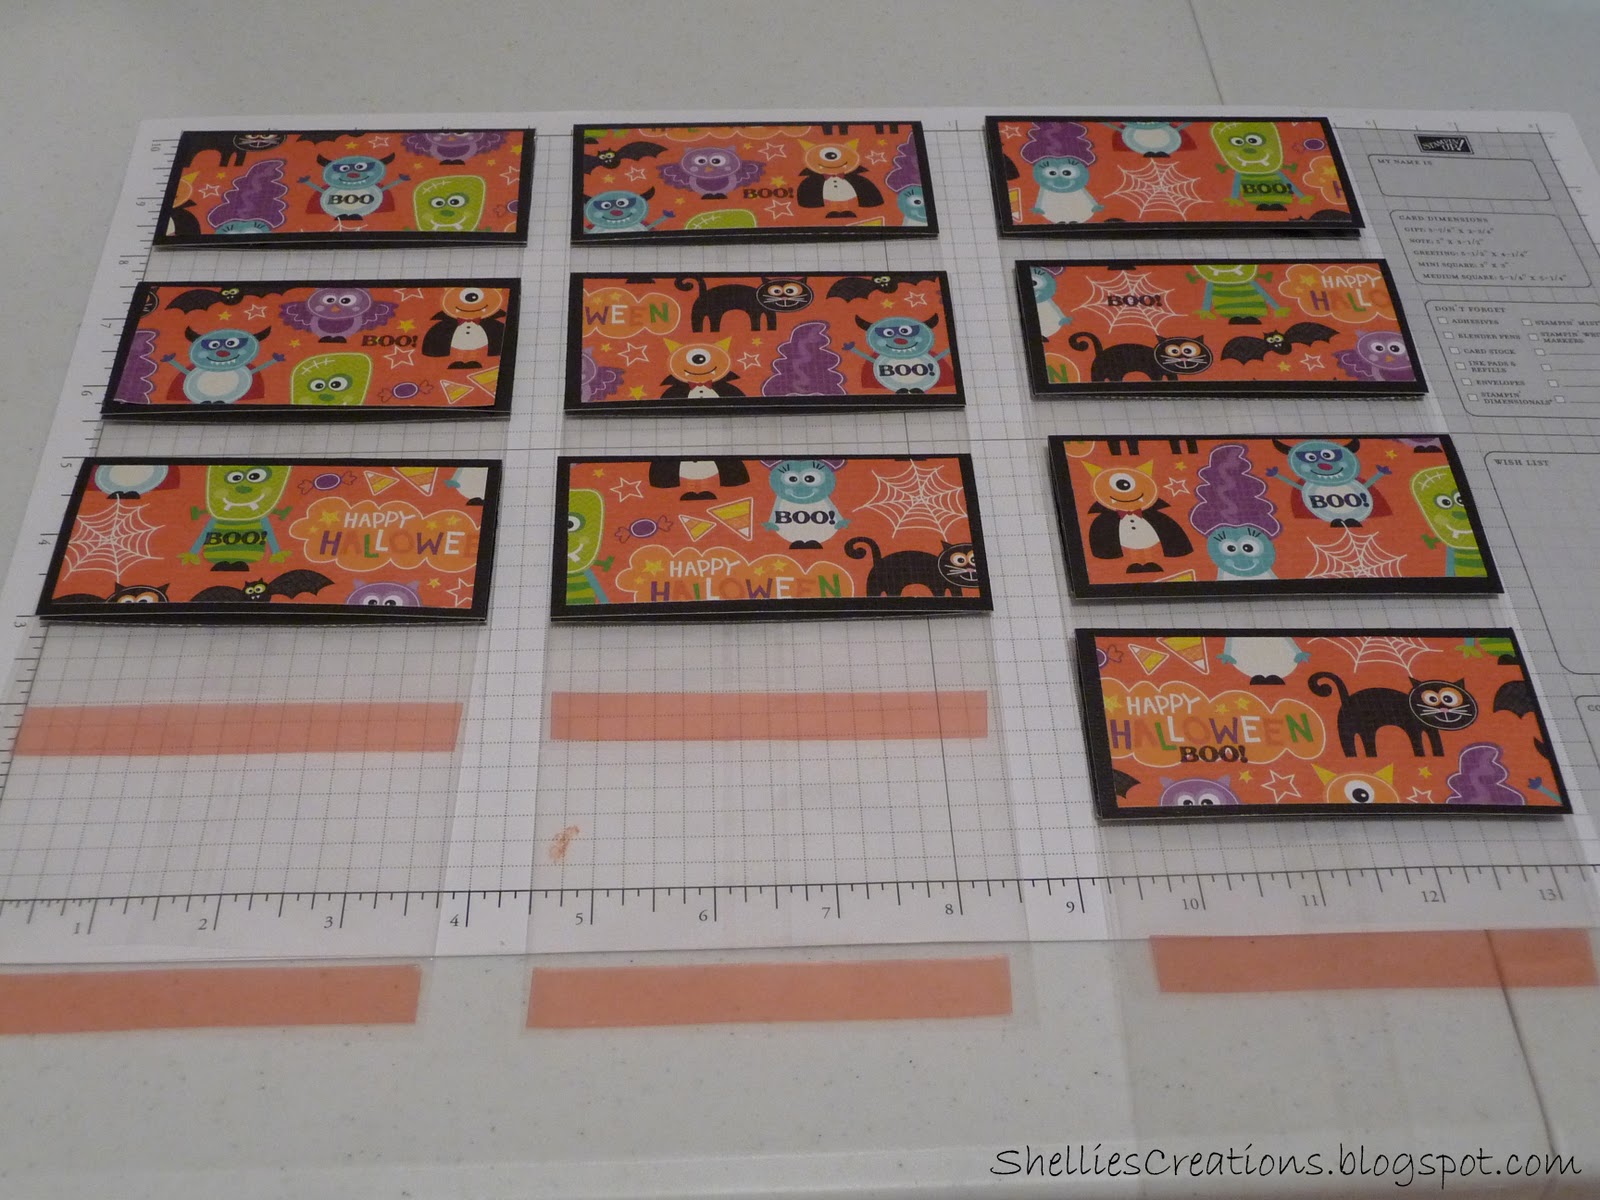
I am currently working on some baby shower invitations for a friend so in the meantime I am going to post the Halloween Goodie Bags that I made for my husband's co-worker for her son.
 Materials Used:
Colorbok Black Cardstock
K&Company Spooktacular Patterned Paper
Stamps - PKS Halloween Sweet Folks (BOO!)
Stampin UP 4x6 Cello Bags
ATG 714 & Sticky Strip
I cut the end of the cello bags & added some sticky strip so when she fills her bag all she has to do is remove the sticky strip & seal it. Yes I know it is going to be very hard to get those suckers apart...didn't think of that at the time of making them, but she said that it would be funny watching them try to get them open so it all worked out, lol.
I will be posting the ones that I made for my husband to take to his co-workers once they are full of goodies. Now back to working on these invites that need to get done =) Have a great day!
Colorbok Black Cardstock
K&Company Spooktacular Patterned Paper
Stamps - PKS Halloween Sweet Folks (BOO!)
Stampin UP 4x6 Cello Bags
ATG 714 & Sticky Strip
I cut the end of the cello bags & added some sticky strip so when she fills her bag all she has to do is remove the sticky strip & seal it. Yes I know it is going to be very hard to get those suckers apart...didn't think of that at the time of making them, but she said that it would be funny watching them try to get them open so it all worked out, lol.
I will be posting the ones that I made for my husband to take to his co-workers once they are full of goodies. Now back to working on these invites that need to get done =) Have a great day!
Subscribe to:
Posts (Atom)




 Posts
Posts


